Benefits of Dry Brushing

So there's this new thing that people are doing. Only it's not new. Before the new people started doing it, OLD people have been doing it for THOUSANDS of years. Maybe they're not old. Or maybe its this old thing new people are doing. I don't know. Try not to confuse me.

The new/old thing is called dry brushing. It seems a little wacky, but apparently that is the criteria for everything I do now. You simply take a natural bristle brush and brush your body with it.


Here are the reasons I love it:
1. It's cheap
2. It makes your skin soft

3. It feels great

If you want to improve the texture of your skin without spending a lot of time and money, you should seriously consider this. I bought a brush in the bath/spa section at Target for less than five dollars. It is so easy to do. Start at your feet and brush upwards using overlapping strokes then do your arms and torso, always going towards your heart. From what I've read you are following the natural flow of your lymphatic system so it is great for circulation and is detoxifying as it helps your body to release unwanted junk. I don't know if that part is really true, but even if it isn't I can tell a difference in my skin after only a couple of weeks.

Also, I noticed that when I dry brush before bed, my feet aren't as icy as they usually are. That tends to make me think that it does improve circulation.

There are reports that it helps with cellulite. The Huffington Post tested a bunch of home remedies for cellulite, and dry brushing was the one that showed the greatest improvement. Throw in the fact that there are no expensive chemical laden creams involved, and I am all in! I'll report back if I notice a difference in that area, but don't expect any pictures!

I mentioned that it feels great and I think it does! At first it seemed a little too abrasive, but I've decided now that I really like it. I've always loved having my back scratched and this is like that times a million. If you are sensitive, you might have to start out with a light hand and work up to a more firm brushing.

It is exfoliating, so it might be good to stand in the shower when you do it. Also, along the hygiene line, it is also recommended you wash the brush at least once a week. I do this by bringing it into the shower and washing it with a little bit of shampoo. Hang it up to dry and it will be ready by the next time you need it.

I've talked to several people about it and most of them have never heard of dry brushing, but two have been like, "oh yeah, I've been doing that for eighty years." Whatever. I should say "thanks for telling me about it." Jerks. (hee hee)

Kristy

Natural Homemade Deodorant Recipes

One recipe I think I share more than any food recipe is the recipe(s) I used for my deodorant. I have been SUCCESSFULLY using homemade (all natural) deodorant for over two years.

My main reason I switched was because of my sensitivities to chemical fragrances in deodorants/antiperspirants. I can even smell the “unscented” kind. Plus, I liked the idea of not putting chemicals, especially aluminum-based compounds, on that part of my body where so many lymph nodes are located.

There has been quite a bit of research done in this area. Does antiperspirants and deodorants increase the risk of breast cancer? Right now, many researchers say it’s inconclusive yet they have found correlation. The same is said with women who take oral contraceptives for prolonged periods of time. An increased level of estrogen can cause breast cancer, so if you are at a higher risk of breast cancer (family genetics), then physicians usually discourage extended use of oral contraceptives.

And even IF there was not a correlation found, I have three good reasons I feel I should keep making it.
  1. My homemade deodorant is a LOT cheaper.
  2. My homemade deodorant is keeping me from the migraines that chemical fragrances cause.
  3. My homemade deodorant is keeping me from using synthetic chemicals on my body at all as I strive to switch toward natural cleaners and health/beauty products for myself and my family.

Kristy shared a super simple deodorant recipe last year and went into more detail about a few of the harmful COMMON ingredients in antiperspirants and deodorants if you want to read more in that area.

Deodorant Recipe #1

Coconut Oil Deodorant
adapted from this recipe

1/3 cup organic extra virgin coconut oil (Where to buy)
1/4 cup baking soda
1/4 cup arrowroot powder (Where to buy)
4 tablespoons cornstarch (this will add an antiperspirant effect to the deodorant.)
10-20 drops essential oils (Email me if you want to know what company I recommend!)

Slowly microwave coconut oil just until melted. Mix baking soda, cornstarch, and arrowroot powder slowly in with the melted coconut oil. Add 10-20 drops of your chosen essential oil. Add more coconut oil or arrowroot powder to achieve your desired consistency. (Substitute arrowroot powder for baking soda if desired.)

Store this in an airtight container and use about a pea-size amount on each underarm. I have also made this recipe adding 2 tablespoons of melted beeswax and poured the ingredients in a deodorant tube.

Deodorant Recipe #2

Bentonite Sensitive Skin Deodorant
adapted from this recipe

6 tablespoons arrowroot powder (Where to buy)
3 tablespoons shea butter (Where to buy)
2 tablespoons organic extra virgin coconut oil (Where to buy)
1 tablespoon baking soda (or arrowroot powder)
2 tablespoons bentonite clay (Where to buy)
10 drops essential oil(s) (Email me if you want to know what company I recommend!)

Add the shea butter and coconut oil in a glass bowl and slowly heat in microwave until just melted. Pour in the essential oil.

Meanwhile, in a separate small glass bowl, mix together your dry ingredients with a wooden or plastic spoon. The bentonite clay and anything it’s mixed with cannot touch metal. If you want you can substitute arrowroot powder for the baking soda if your skin is extra sensitive.

Add 1/3 of your dry ingredients to the melted shea butter and coconut oil. Mix until incorporated. Then add another third of your dry ingredients and mix until incorporated. Then add the last of your dry ingredients. You should now have a wet paste in the bowl. Scoop the mixture out and press into an airtight glass jar and store away from direct sunlight. Mixture will become more dough like as it cools down.

Apply a tiny pea-sized amount to both underarms for all day protection.

Some of my favorite 100% therapeutic essential oils to add to my deodorant recipes include melaleuca, lavender, frankincense, protection blend, and orange.

CLICK HERE FOR A PRINTABLE VERSION OF BOTH RECIPES

These deodorant recipes are not original to me, but I have altered them a bit to make them easier to make and easier on my body. This recipe has worked for MANY of my friends but for a select few, it did not work or they had an allergy to an ingredient. Kristy had what she thought was an allergic reaction but I have since replaced the original recipe that included baking soda and arrowroot powder for all arrowroot powder. I purchase my arrowroot powder at a local Mennonite bulk food store but you can buy it online at the link I provided.

You can make it smell however you want by adding your favorite smelling essential oils. A blend I love is frankincense with lavender. I get all the healing, germ-fighting, immune boosting benefits of the frankincense and lavender when I use my deodorant! See my website for ordering or email with questions.

The first question I ALWAYS get when I tell people I make my own deodorant is: does it work? Do I sweat in other words? I do not sweat easy so I rarely have any issue with this. That is not to say I occasionally sweat but I DO NOT stink when I sweat thanks to the antimicrobial essential oils I add to my deodorant. I have shared MANY samples of my deodorant recipes with friends and they have soon asked for the recipe because it worked for them too.

Before trying to make my own, I had tried a popular brand of natural deodorant that did NOT work and left me smelling....well, of B.O. (Yuck!) So give this a try!

Would you like to have the chance to try a sample first? Enter to win a sample of both deodorants by leaving a comment below. Make sure you use a valid email address to sign in! The winner will be chosen Sunday by a random number generator!

Do you already use a natural deodorant? Are there other natural products you have switched to as you learn about the dangers of synthetic and even some natural chemicals? Tell me about them!

Soda Alternative

Today's post is going to be short and sweet. Literally. It is sweet. I want to share a drink recipe with  you. My husband and I discovered and/or invented this drink about four years ago when we were doing a diet that had us completely off of sugar.

Neither of us were big soda drinkers, but there are times when you just want something besides water. Since juice was off the table due to our diet we were looking for other options. Somewhere we read about buying seltzer water and flavoring it with stevia, so we gave it a shot. I am currently doing a detox with a group of friends of Facebook and one of the guidelines for the detox is to avoid sodas. Whether you go with regular or diet, they are both full of unknown ingredients that have negative effects on your health. The sugar in the leaded versions isn't good for you, and the artificial sweeteners in the unleaded versions are even worse. I know for some of my fellow detoxers, giving up soda is one of the hardest parts.

I have a solution that can help in the transition away from sodas. My husband and I rarely drink these anymore, but our kids still like to have them from time to time.

The primary recipe only calls for two ingredients. Buy a bottle of carbonated water. There is a whole section devoted to this in the grocery stores. I buy whatever is cheapest, but make sure it is not flavored. Avoiding the artificial flavorings is the whole point of what we are trying to accomplish with this drink. The other ingredient is liquid stevia. THIS is the brand we  use.

Some people who have used the powdered stevia say they don't like stevia because it is bitter. I agree. The powdered versions do have a bitter aftertaste. I never use it. However, don't let that stop you from trying the liquid version. It does not have the bitter taste at all. It comes in plain, and in several flavors. We always have plain and vanilla at home. In fact my husband orders it twelve at a time. One bottle lasts a long time, but it is cheaper that way. He uses it daily in his hot teas that he makes. We also use it to sweeten plain yogurt.

All you do is pour a glass of the seltzer water and add a dropper of the vanilla stevia. It tastes like a vanilla creme soda, without any of the artificial sweeteners or other misc. additives.

But wait... isn't stevia an artificial sweetener? No, its not. It is just an extract from the Stevia plant. Last year Leslie and I ordered some seeds for some new plants and split up the packs. I planted stevia and attempted to grow it. It was in a little pot in my window sill. After six months it was only one inch high and sometime this fall I let it go too long without watering and it died.

My friend Sue had a plant at her home that flourished. One day she brought me a big stem from it. It was about thirty inches long! I pulled off a leaf and nibbled on it and it tasted EXACTLY like the extract we use. I was so excited. The next day I gave my youngest son a piece and told him to eat it and tell me what it tasted like. Surprisingly, he obeyed. His eyes lit up instantly as he recognized the sweet taste and said STEVIA!

I stripped the leaves and dried them and then ground them up in my handy dandy little spice grinder and put them in a spice jar. It was the first time I had done anything like that, so I enjoyed the process. This year I will try my hand at growing Stevia again, but I will do it outside this year.

Liquid stevia does come in some other flavors including lemon, so you might try that too and make your own healthier version of Sprite.

Have you ever tried anything like this? How did it turn out?
Kristy

Valentine's Day Gift Boxes

If you let it, Pinterest can really intimidate you. If you let it then it'll make you think you are the only one out there who doesn't make your child's lunch look like a work of art with owl-shaped sandwiches and melon cut with letters of the alphabet, that you are the only one who doesn't make felted slippers for your friend's new baby, and that you are the only one who doesn't make furniture out of reclaimed wood pallets. I think some people go on Pinterest and have similar feelings as those. I know that it's really people who create these things as an outlet while their kids are napping or are at school or who have blogs for businesses and get paid to be creative. They don't all fall into those two categories though.

For me, being creative and doing crafty things makes me so happy. I like doing it for myself, and I like doing it for my family. I have had many friends in the years past tell me they are not creative. I have a lot to say about that which I will not get into on this post - maybe some other time when I'm thinking about it again and want to share my thoughts on the subject. ;) But I do want to say this: I think God made us all creative in some way whether it's problem solving, a musical talent, cooking, helping others not think about their problems, etc. Creative does not equal artsy stuff.

One thing I had pinned and wanted to do for Valentine's Day a couple of years back (2013) involved a countdown to Valentine's starting the first of February. Kids like countdowns! We do an advent calendar every Christmas that is a favorite. This year I revived my "lunchbox cards" idea and gave them to them starting the first of December for a countdown. (I also shared it on our site, Countdown to Christmas Lunchbox Cards.) I think I may create something eventually for the kids for their birthday for a countdown. Well, on the other hand, I probably don't need to as they usually start their own countdown at least a month in advance!

Here's the image I had found on Pinterest:
via How Does She?
The problem was that I could NOT find any of these cute little mailboxes. None at Hobby Lobby or Michael's. Those are my only two choices in our area. I did look at Walmart (just in case) too with no luck. So I made do with what I did find and went with it - embossed paper mache boxes.


I tried to play with the embossed parts and the paint. I mixed some browns for the first box trying to get a "chocolate" brown color. After I painted several coats and let it dry, I used a makeup sponge and very little red paint to lightly rub across the embossed area trying to just hit it the high points. As you can see I had a little too much paint on a few places. I also used the red for the top edge of the box lid. 

I used scrapbook paper from my stash to put inside both boxes which I painted first. For the bottom heart box I painted it white first (a couple of coats) and then red (another couple of coats). Using a fine grit sanding block, I sanded off off the red to show the white underneath in a few places with some light swipes. Both projects went fairly quickly. The paint dried quickly. Probably the slowest part was cutting the paper to fit inside which I adhered with Mod Podge. I also applied a top coat of Mod Podge to help seal the paper.


The kids loved them and that's what counts. ;) They enjoyed seeing each day what "Cupid" was going to leave them. I called myself "Cupid" which they thought was pretty funny. I'd say, "Looks like Cupid has been by" or "Oh, I think Cupid has left you something!" LOL

The boxes did take a little bit of a beating with the constant on and off of the lids. I wish I hadn't put paper inside the inner edges of the lid since it was sort of tight and rubbed some. It would probably do good to put another coat or two of Mod Podge on it.

Things I put inside the boxes included little treats such as packaged muffins, gum, Mentos, Hershey kisses, etc. Yes, mostly junk food which meant that "Cupid" didn't arrive most days until after dinner.

It has been just another way to show my kids I love them and to do something fun for Valentine's Day especially since they are not in traditional school but are homeschooled. Hey, even though both my kids are teens now, they like surprises and do appreciate my thoughtful gestures like this.

There are lots of creative ideas for Valentine's on Pinterest that you could incorporate into this project. Here are a few...
via BHG

via zakkalife
via make-it-do
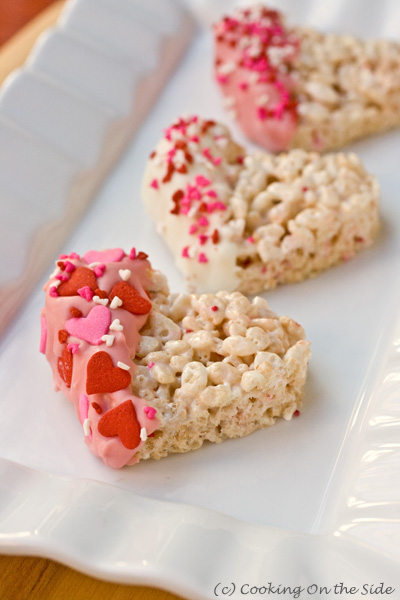
via cookingontheside
DIY scratch-off cards via patandlindsay
via SkiptomyLou
If you do not like to give your kids candy then do vegetables and fruit and wrap little strips of paper on them that say things like, "Orange you glad I'm your mom?" or "There's no raisin I wouldn't love you!" You could include a ticket to go out for pizza and write, "You got a pizza my heart." Here's a link with lots of other funny Valentine's Day puns you could use.

This idea can be used for any special person in your life - your spouse, nieces/nephews, grandchildren, friends, etc. Hey, even adults like little surprises like this. It does not have to be a countdown. Take the container idea and use it to hold a little Valentine's Day gift or take the fun ideas above to give to friends at work, church, or wherever.

I've allowed you two weeks before Valentine's Day to get the supplies and get crafty. Keep it simple or get elaborate. No matter what, I know your loved ones will LOVE your thoughtfulness!

Now GET CRAFTING!

Chalkboard Wall Hanging

Today I want to share with you a project we did at our ladies craft night at my church. It is an annual event for the ladies in our community. This year we had around 150 ladies.


Our project starts with these trays purchased from the Dollar Tree. They come in round, oval, and rectangular shapes. They can be ordered online if you need a lot like we did. It is such a simple idea but can be used in many rooms of the house. They're small enough to use on a door with a simple "welcome" message or beside the door you exit for notes and reminders. You could hang it on the wall in a bathroom or bedroom with a Bible verse you want to remember. It could even be used to write your menu for dinner! I'm sure you can come up with many more possibilities.

Here's what you do...
Buy a can of chalkboard paint like the one we used HERE. Using a 1" foam brush, start by going around the outer edge in a smooth straight line. Don't worry if you have a shaky hand. This  project is very forgiving. Then fill in the middle using straight lines going in one direction. Either wait for it to dry or use a hair dryer to speed the process like we did.


Then, do the same thing, going in the opposite direction this time. Let it dry.

We used 2" double faced satin ribbon to make bows for the fronts and a loop to hang it from on the back. The bows and loops were glued on with hot glue guns. After you make your bows, use a match, grill lighter, or candle to heat seal the edges of the ribbon. The satin tends to fray easily.

I read that it was recommended to cover the whole face of your surface with chalk and wipe it off before using your chalkboard, so that is what we did.


You're now ready to hang your memo board. I hope you enjoy this fun, easy little project. The ladies at craft night really seemed to like them.


Oh, and I have some friendly advice for you. If you ever need some pictures taken because you have a blog post due the next morning and you've been CRAZY busy and barely know which end is up, don't give your phone to these two and expect them to help you out. You might end up with your phone FULL of pictures like THESE....


and not have HALF the pictures you actually NEED! Thanks girls! You know what they say about paybacks, right??? At least I didn't post the indecent ones. You can thank me later.

Thanks Robin for coming through for me.

Kristy
 
Google+